|
A. The Basics
1. Understanding World Instances
2. Creating Your Character
3. Moving Your Character
4. Managing Your Character
5. Stats, Skills & Gaining Levels
6. Interacting With Game Objects
7. Magic
8. The Action Bar
9. Currency, Vendors & Banking
10. Quests
11. Time System & Blood Moons
12. Death
13. Game Menu and Options
14. Using The Compass
15. Riding a Mount
16. Fast Travel/Star Stones
17. Creature & Item Spawning
18. Work Orders/Apprenticeships
B. Housing / Properties
E. Quest Walkthrough
Got questions, ask here! Join Discord Join Discord
|
Designing Architecture PlansGetting StartedYou can design plans while they are in your player inventory. Simply click on the edit text below the architecture plan. This will take you to a design editor that will allow you to edit the plans using the in-game light map editor. When you are starting out it might be easiest to start by looking at an premade plan from the banker and seeing how the different pieces of a structure fit together until you get the hang of editing. Sizing Your StructureBefore designing plans you should already have bought a property or have a property in mind. It’s best to first set the size of the plan to the size of the property you have purchased or planned on purchasing before doing any editing. 
Note: The number of levels for the structure you are editing includes the roof level. So assuming you do not have a flat top roof such as the top of a castle and are using a normal roof, you really have access to Levels – 1 for usable area. So 2 levels = 1 story house, 3 levels = 2 story house and so on… Adding Parts to the map editorOnce getting your property size set on the plan, you can start adding parts to the map editor by selecting a structure type / style and part. Its easiest to start with flooring your structure first. Its best to use an even number of tiles for the internal area of your structure for at least one direction. Roofing requires the internal area be even for gables and roof top to line up correctly (or if looking at external walls an odd number in the corresponding direction). To add parts you can either click on a tile to add the part there or left click and hold down and drag to fill an area with the mouse. 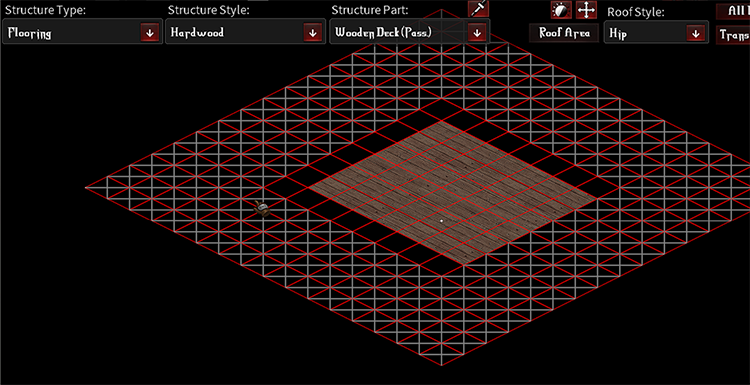
After you have your base floor setup, you can add some walls by selecting the “Structures” type and then a wall style you like. Necessary parts can be selected from the part dropdown (or see tip below for quickly navigating parts) 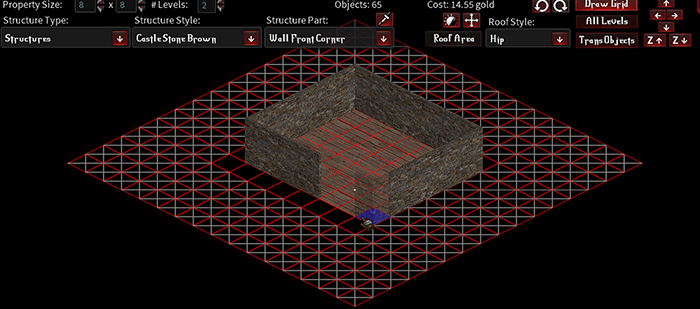
There are four main wall parts to construct walls, a left side, a right side, a front corner, and a back corner. These pieces can be used to construct any kind of rectangular based shapes. Note: the same combination of parts exist for 1/3 sized wall parts that will allow you to construct smaller wall shapes as well. Tip: You can use your mouse wheel while over the map to quickly wheel through all the parts for the current style making building faster and easier to navigate between pieces rather than using the dropdown. 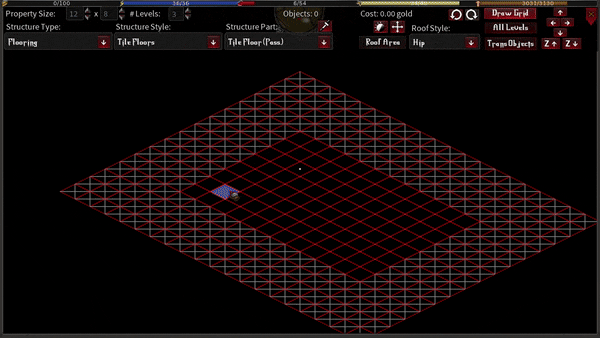
From here you can access other types of parts from the dropdown the same way as the flooring or structure walls. Some parts may seem confusing until you see them in use on another plan or play with the editor. Removing Parts from the EditorYou can remove parts similar to how you added them except by using the right mouse button instead of the left. Right click to remove a single item you are over or hold the right mouse down and drag over an area to remove all objects in an area. Note when you have tiles on top of objects, dragging once will remove objects from the area. Dragging a second time when no objects are present will remove the tiles from the area. 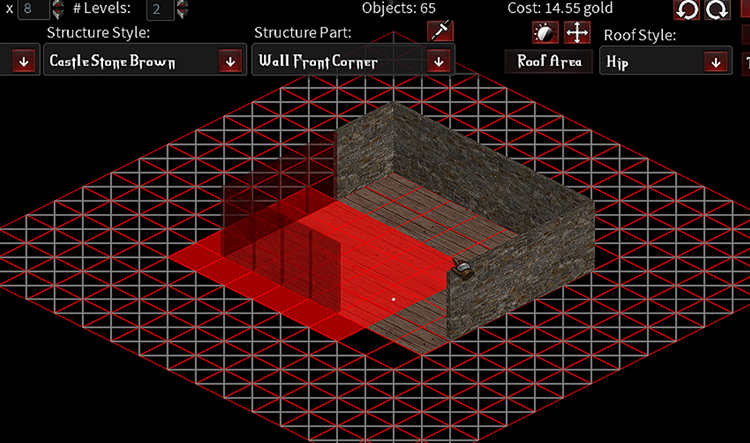
Navigating to upper LevelsWhen you have the base level of your structure complete, you can use the Z up arrow button to navigate up to the next level. Note the grid will change to a yellowish color signifying you are not on the base Z anymore. The lower-level structure parts will appear as semi translucent and cannot be interacted with while on the upper level. Similarly, you can use the Z down arrow button at the top right of the editor to move down a level. Panning the MapYou can pan the view of the map by using the arrow buttons at the top right. This will allow you to navigate larger size designs more easily. Sampling Parts From the EditorAnother way to quickly get back to a part you used before is by using the eye dropper button from the editor menu and clicking on a part you want to place again. Shifting PartsOne of the most flexible functions of the editor is being able to shift many parts on the editor. To shift a part click on the multi-directional arrow icon which will place you in shift mode, then click on a part you want to shift. You can use your arrow keys to move it up/down/left/right. Each type you press the arrow keys it will shift it one pixel in the corresponding direction. This allows you to “cheat” layout limitations in the editor or get a specific look you want that might be impossible otherwise. To exit shift mode simply click on the shift button again to toggle it off. 
Shadowing PartsYou can shadow parts using the shadowing button. While in shadow mode, click on any non-tile part you want to add a shadow to, this will make it so when levels above are rendered (or all levels is turned on in the editor) the part appears darker in the editor creating a shadowing effect. Useful overhangs or creating depth. 
Adding A RoofDepending on the complexity of the structure you are working with, adding a remove may be really easy or fairly complicated. If you planned accordingly with structure size and your shape is a rectangle then adding a Hip or Gable style roof should be easy using the roof area button/roof style dropdown. However, if you are working with L shaped, T shaped, or other oddly shaped structures it will need to be done manually and is a little more daunting especially the first couple of times you do it. The best thing to do is first study an existing plan that might be shaped somewhat similarly to your structure. There are numerous premade structure styles that can be looked at for reference. To get you started, the first and most important step is filling your roof level with “Roof Fill” tiles in the corresponding direction you want exposed. If you are using a fully Hip style roof, it does not matter which side you use as it wont be exposed. Roof Fill tiles are present for every style of structure and is a part in the list. This will match whats present on the level beneath making it appear like a seamless wall. The importance of this tile is telling the game engine there is a level above your character and it should collapse the structure when you walk into it which is why even for hip style roofs its important. 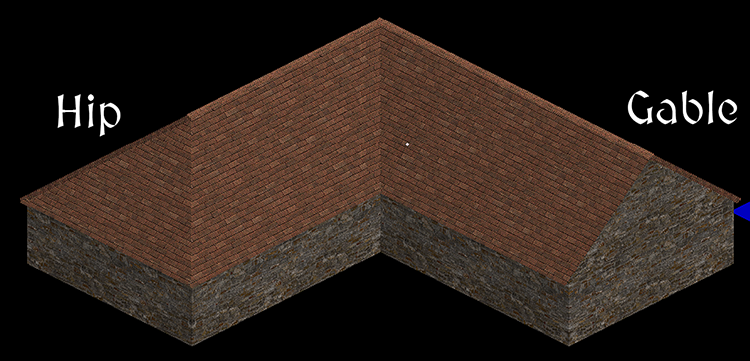
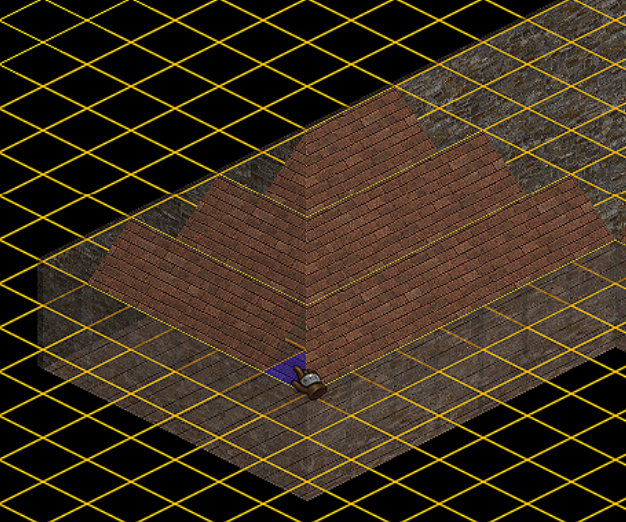
After getting the base Roof Fill pieces down, I find it easiest to put down the parts titled “Front Left” and “Front Right”. These tiles make up the majority of what you actually see as a player. Refer to L shaped structure image below about placing these as an example, on the right facing side it shows a gable style layout and the left shows a hip. 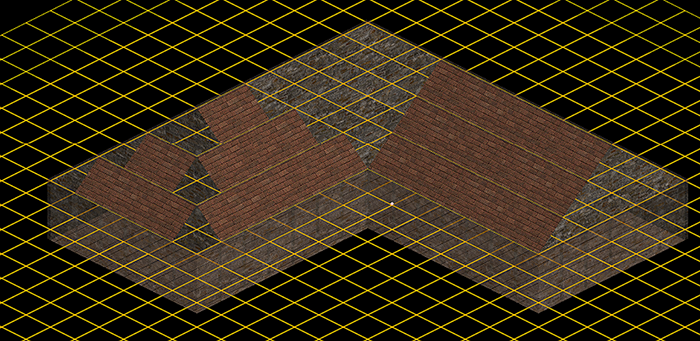
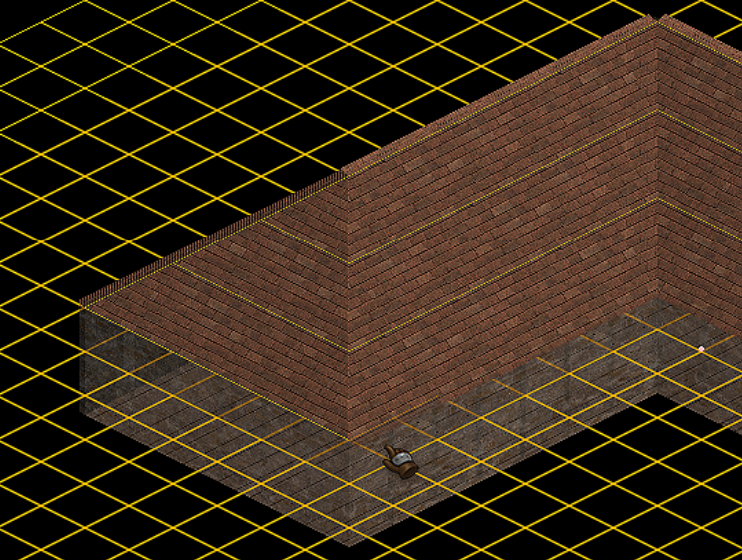
Once you have all the front facing pieces placed, if you are doing a hip style roof, you will want to start filling in the triangular corner pieces next, as shown below in the two images. Once you have these in, your roof will start taking shape. 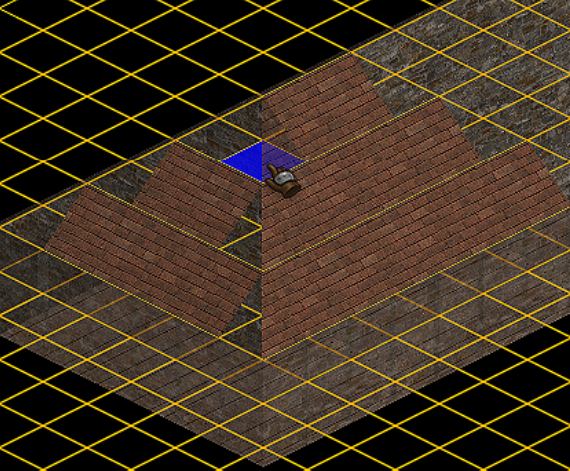
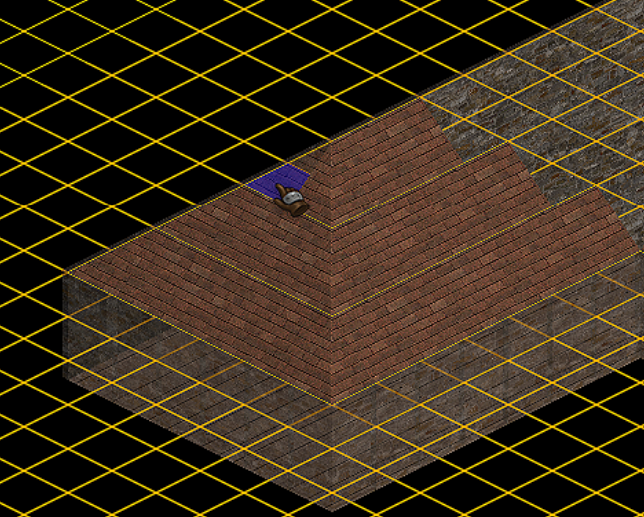
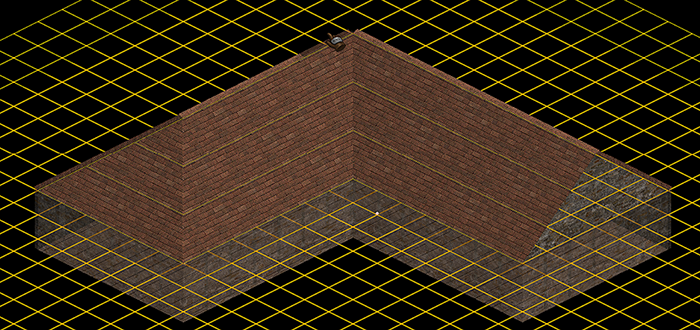
If you are working on a gable style roof, you can add the top pieces. Note there are multiple parts that look the same with different placement offsets. You will want to use the pieces that align closest with the tile you are over for this. 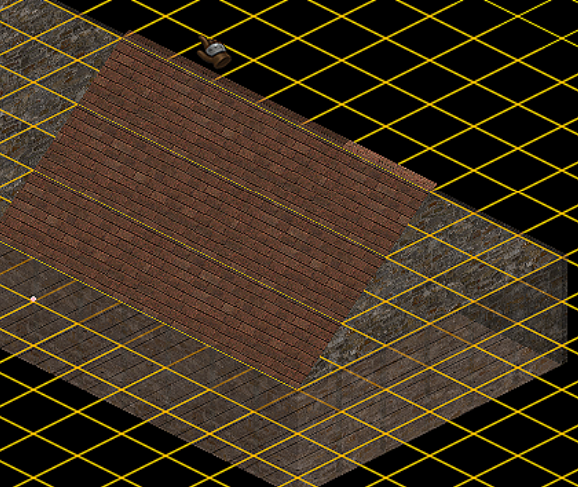
After you have the gable top on, you can add the back edge of the house, similarly shaped to the top but darker and typically a slightly different texture angle. Just like the top part, be sure you pick the part closest aligned to the tile that you are working on. 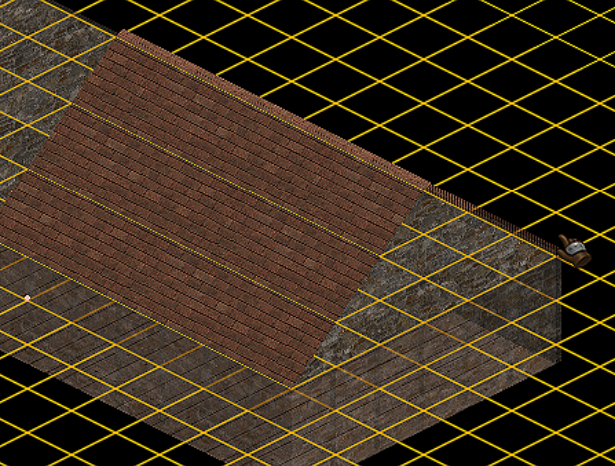
If you are doing an L shaped structure, you can add the interior corner connector piece as shown below: 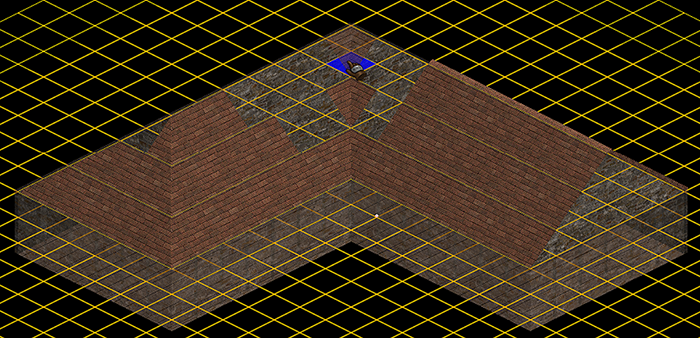
After that you can fill in the remaining front pieces to connect the two sides as shown below: 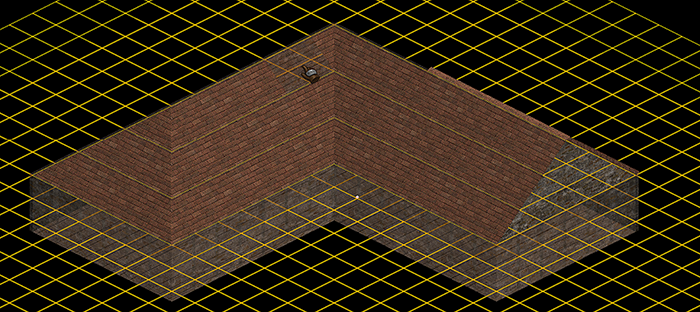
From here, its just a matter of filling out the back and top on the hip/gable sides as shown in the images below. 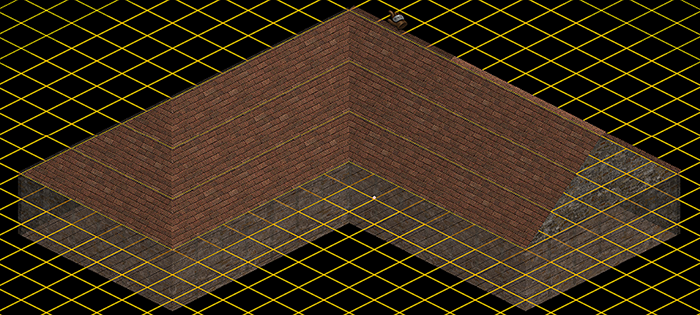
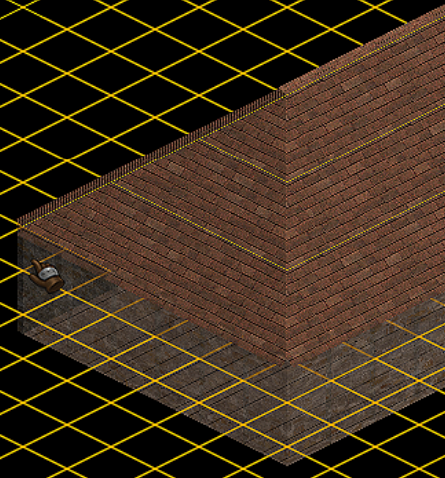
Once you have your roof looking mostly complete only a couple of steps remain. First add an edge overhang for the roof to the front side of the roof, this will make the front look a little nicer with a slight overlap. Simply find and add the edge pieces for the front left/front right on each side as shown in the images below: 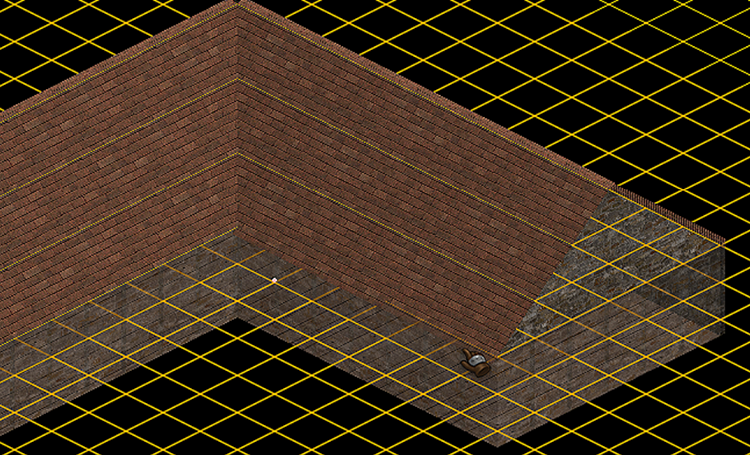
After that you will need to add the finishing touches to the corners to make them look aligned and polished. The easiest corner to start with is the back corner on the gable side of the house. There is a special roof back offset piece for this that you can place as shown below. This piece is identical to the roof backing used earlier except its offset to be overlapping with the tile behind it. (see below) 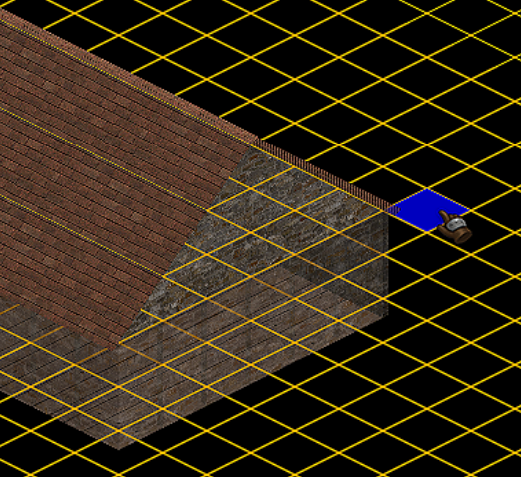
Next you can do the hip side left front corner. For this we will use two parts. First a left facing back part that is offset like the piece we used for the gable back above. Secondly, we will use a front edge piece with a a different offset than the standard edge to overlap it and neaten up the edge. If needed you can also use the shift tool to nudge the edge anyway you like. 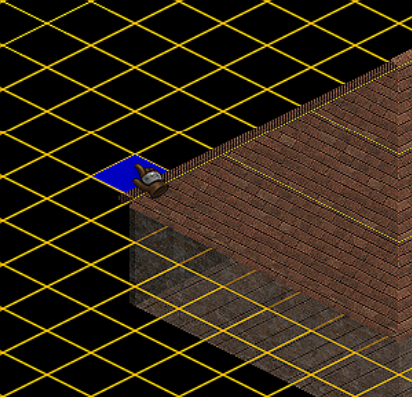
After that you can add another front facing edge piece to the hip side right front corner. Just like above you can shift that piece into place using the shift tool. 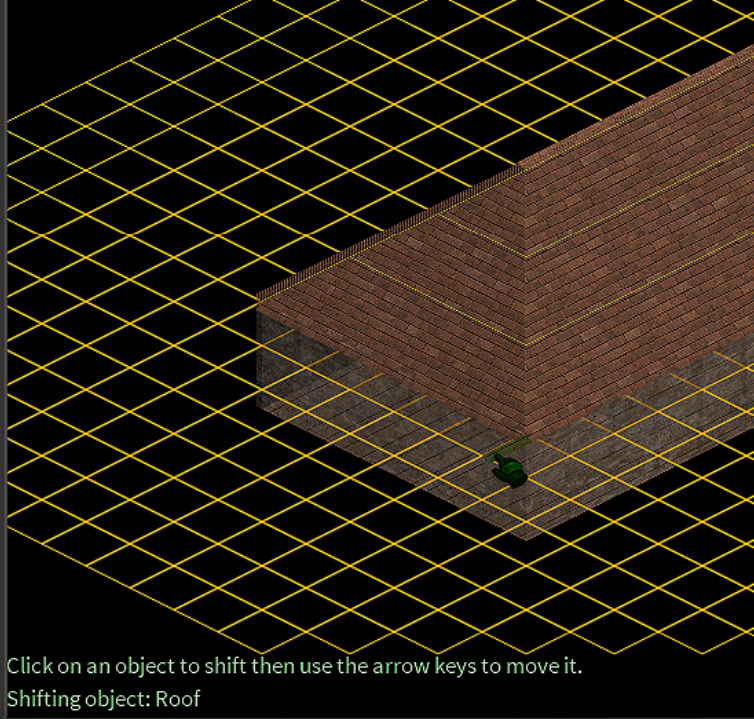
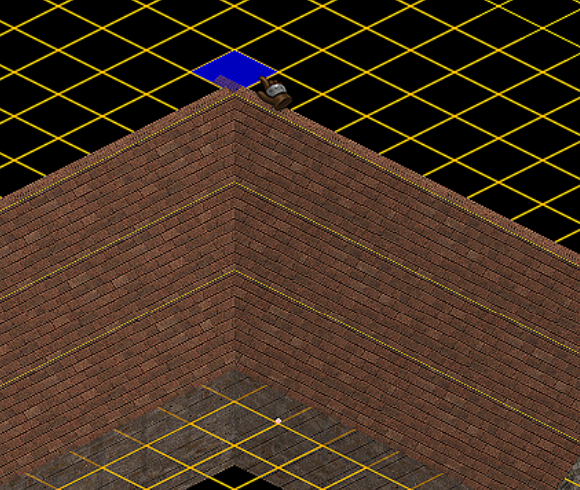
Finally, the last step is filling out the very back joining corner, for this you will simply add another top piece of either the gable side or the hip side and shifting it to line up with the look you want for the back corner. See below: 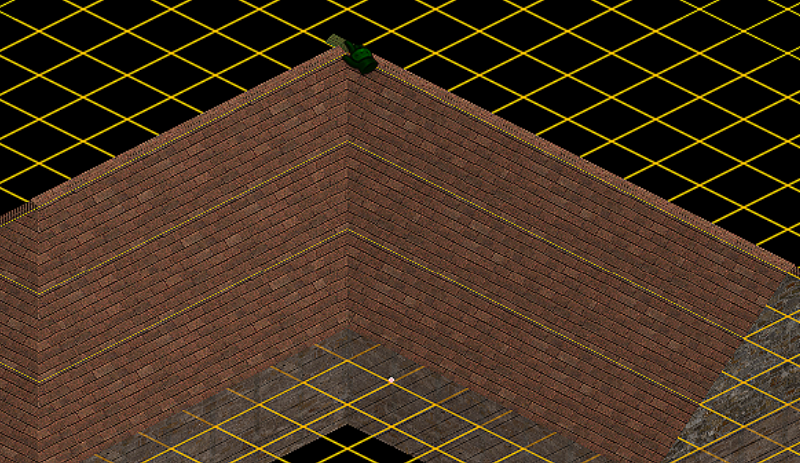
And that is how you can do an L shaped roof, its possible to do T and other shaped structures that you see around town using very similar steps. If you experiment you can adapt the techniques to create many different designs; probably even some I haven’t thought of. So happy roofing! Undoing and Redoing EditsEach edit you make to the map can be undone using the undo button at the top. These are very handy for troublesome mis-clicking as I am prone to :-) Redo will essentially redo your last undo. Saving your editsYou will be prompted to Save when you close out of editing your plan using the close button at the top (not closing the whole game). |